

Learning how to tie dye t-shirts with things in your household is not only a fun craft and activity to get stuck into over the weekend but it’s also a great way to re-use old clothes and turn them into something you’d wear again.
Tie dyeing t-shirts is one of those crafty fashion trends that always come back into style every couple of years. The versatility of the print and the many ways that you can tie dye t-shirts yourself makes it an appealing craft project for beginners as well.
We've created this step-by-step guide to help you create your own unique tie dye patterns on t-shirts, but the same techniques can be used on all sorts of fabrics and clothes. From socks to jeans, old white shirts and all sorts of home furnishings like cushion covers or dip dye napkins.
How to tie dye t-shirts
To tie dye t-shirts, you will need:
- Elastic bands or string - we've used string throughout as we had some already but elastic bands are great for speed
- Pre-washed and still damp t-shirts (or another item you wish to dye)
- Rubber gloves
- Fabric dyes, we've used a range of Dylon fabric hand dyes in Paradise Blue, Passion Pink, Ocean Blue, Sunflower Yellow, Tropical Green, Tulip Red and Peony Pink
- Old bottles or cartons with caps or spray attachments (plastic drinks bottles work best)
- Warm water
- Salt
- Large and deep dishes or trays for dyeing
And these added extras will help to create even more unusual designs with your tie dye:
- Cling film
- Microwave
- Air or water-erasable pen
- Ruler
- Ice
- Cooling rack
Preparing to tie dye t-shirts
- Begin by mixing up the powdered dyes with warm water and salt, following the manufacturer's instructions for the measurements. We made up 500ml in each dye colour.
- Pour the dye mixtures into the clean bottles or cartons. Top with a spray attachment or use a push pin to create a hole in the top of the old cap to squirt the dye through.
- Make sure the fabric or item for dyeing has been washed and is still damp before you begin dyeing.
- Cover all your surfaces with a protective sheet or, better still, take your dyeing outside on a sunny day for less-mess. Tie-dying, with all its potential for mess, is a great outdoor craft!

How to do different tie dye patterns
There are loads of ways to create different patterns when tie-dyeing, most methods use string or elastic bands to fold and shape the fabric before applying the dye. Take a look at our step-by-step instructions to create your own psychedelic designs or bold patterns.
How to tie dye a spiral t-shirt
1. Start by twisting the centre of the t-shirt or fabric into a spiral shape.

2. Keep squashing the t-shirt into the spiral shape, eventually gathering all the fabric into one big, tight spiral ball.

3. Using either string or elastic bands, gather the spiralled t-shirt together into six sections - you can add more sections if you're using more than three colours.

4. Now it's time to tie dye! Place the spiralled t-shirt into the bowl and apply your chosen dyes - for this project we used Dylon's Sunflower Yellow, Paradise Blue and Passion Pink dyes. We've chosen to only dye every other stringed-off section to leave some of the white t-shirt on show, but it's up to you how you decide to dye your t-shirt. Allow the dye to soak in following the manufacturer's instructions. Rinse off with cold water and then it's ready for washing.

Watch our step-by-step video on how to tie dye:
How to tie dye a chevron stripe t-shirt

1. Begin by folding your t-shirt lengthways in a concertina pattern. We folded our t-shirt into five, but you can fold as many times as you want. The fewer the folds, the fewer chevrons.

2. Using an erasable pen, or a pen in a similar colour to your fabric dye, draw diagonal lines across the t-shirt every 10cm. Again, you can increase this measurement for wider stripes.

3. With elastic bands or string, tie the t-shirt up in the direction of the diagonal lines. Gather the material up tightly to make sure no dye can soak in underneath the string.

4. Continue tying up the t-shirt along the diagonal lines along the entire length of the t-shirt until it looks like this.

5. Place the tied up t-shirt in a large dish ready for dying. Using two colours of your pre-mixed dye, apply each colour to every other stripe. We used Tulip Red and Ocean Blue for this project.

6. Once tie dyed, leave the dye to soak in for as long as the manufacturer advises. We wanted a faded, nineties look for this top so we only left the dye on for five hours. Then rinse with cold water until the water runs clear and it's ready for washing.

How to tie dye a circle t-shirt
1. Begin by tugging up small sections of the t-shirt between your thumb and forefinger. Using an elastic band or a piece of string, wrap around the circular section tightly and knot to secure in place.

2. Continue tying off the circles all over the t-shirt like this.

3. Fill a deep dish with the pre-mixed blue dye and dunk your tied t-shirt in the mixture. For this project we used Dylon's Ocean Blue dye.

4. Keep pushing the t-shirt down into the dye until it's completely covered. Leave to sit for about five minutes.

5. Remove the t-shirt from the dye solution and wring out any of the excess dye. Wrap the t-shirt in a piece of cling film and place it on a microwavable plate. Microwave on a high setting for about 1 minute. The heat will help the dye take to the t-shirt and means less waiting around. Rinse in cold water until the water runs clear and it's ready for washing.

How to tie dye with ice

1. Start by stacking your wire rack over the top of your dyeing dish.

2. Scrunch up your damp t-shirt and top with a big handful of ice evenly spread out.

3. Using the powdered dyes, sprinkle directly on top of the ice and t-shirt. For this project we used Dylon's Sunflower Yellow, Paradise Blue and Passion Pink dyes.

4. Put the dish to one side and let the dyes soak in as the ice slowly melts. You'll see the colours deepen and run with the ice. Leave the colours to develop and dye for 24 hours. You might wish to rotate the t-shirt part way through and top with more ice and dye powder for greater coverage. Rinse with cold water until the water runs clear and the t-shirt is then ready for washing.

How to tie dye t-shirts with food colouring
If you don't have any dye at home you can also use food colouring to tie dye t-shirts. But, because food colouring is an acid-based dye, you need to use clothing that is NOT made from plant-based fabrics like cotton and linen. Instead, use a polyester item of clothing.
- Mix two cups of white vinegar to two cups of warm water and soak your clothing or fabric in the mixture for one hour.
- While the clothes soak, mix eight drops of your food colouring with 120ml warm water.
- Use this dye mixture to create any of the patterns listed above.
- Leave to soak for eight hours before rinsing in a salt water solution - 120g salt to 120ml cold water - until the water runs clear. Then the items are ready to be washed.
How to make pastel tie dye
An easy way to create a pastel colour when tie dyeing is to simply dilute the dye with more warm water or to leave the dye soaking into the fabric for a shorter period of time. However this can create a faded look to your item of clothing so, unless you want a t-shirt that looks like it's a genuine vintage piece from back in the day, opt for an ombre pattern to make a pastel tie dye look.
- Make up your dye mixtures in large dishes or buckets, we've used Dylon's Sunflower Yellow, Paradise Blue and Passion Pink dyes.
- Dip your fabric, item of clothing, or napkins in our case, into the bucket, leaving the top edge free from dye. Remove from the dish and set aside for thirty minutes. Repeat, this dipping process, reducing the amount of fabric dipped into the dye every time.
- On the last dipping, the bottom 5cm of each napkin should be the deepest and darkest shade whilst the top edge should be white. The dye pattern should gradually change from white to pastel to bright dye creating a pastel ombre effect.

How to wash tie dye t shirts
Learning how to tie dye t shirts is loads of fun and you can pretty much do it with any item of clothing – like baby grows, socks, jeans or even other materials, like towels and table cloths. However, there comes a time when all these things have to be washed, and that’s when problems can happen. You don’t want your fresh tie-dye pattern disintegrating in the wash, or even worse, the dye moving onto other clothes. Here’s how to wash tie dye in five simple steps…
- Rinse the material with cold water under the sink - After the dying process, you should have rinsed out the material anyway, but if not then go back to this step to be sure.
- Fill the basin with warm water to set the dye - This will stop it from bleeding onto other clothes when it’s put in the washing machine next time. Mix in a small amount of washing detergent into the water as well.
- Leave it in the basin - Let the tie dyed material soak in the mixture of water and detergent for about 15 minutes.
- Wash the shirt again under cold water - But be careful not to rub it too hard otherwise you could risk rubbing off the dye. Then allow it to soak again for another 10 minutes.
- Hang it out to dry - If possible, hang it out over the bath or in the bathroom, to ensure that any leaked dye doesn’t find its way to carpeted flooring.
After these steps, you can wash it in the machine but be sure not to wash the material on too high a temperature for the first couple of washes.
-
 Compromising may be killing your relationship - here are 5 ways to reach healthy compromises, according to relationship expert
Compromising isn't always the best way to keep the peace in a relationship
-
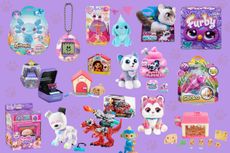 Best interactive pets for kids: 15 gift ideas for children of all ages
From puppies to axolotls, take a look at our selection of the best interactive pets you can buy that are sure to be a hit with little animal lovers


-
 22 kids' party games ideas - we share the easiest games for indoor and outdoor parties
Kids party games that are easy to do and ideal for toddlers to teens are hard to find.... you're welcome
-
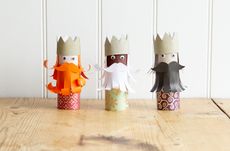 How to make the three kings from toilet roll
Create your very own homemade nativity, including these festive three kings from leftover toilet rolls
-
 1st birthday party ideas that are fun, easy and budget-friendly
It's your little one's 1st birthday but what do you do, here are some ideas on who to invite, where to go, what to bake and how you can enjoy your baby's big day
-
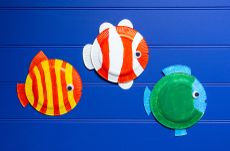 How to make under the sea crafts
Kids will love learning how to make these under the sea craft projects from paper plates, yarn, shells, pipe cleaners, and some googly eyes
-
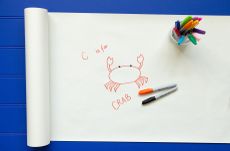 How to draw a crab
Learning how to draw crabs is so easy when you know how
-
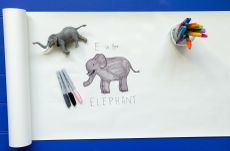 How to draw an elephant
Drawing an elephant is made easy for kids with just a couple of simple shapes
-
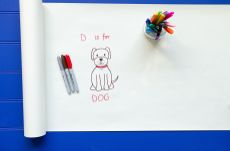 How to draw a dog
Drawing dogs and other animals is easy with our step-by-step picture guide
-
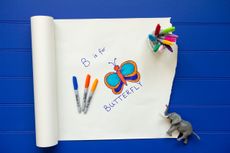 How to draw a butterfly
Use these simple techniques to help kids to draw butterflies


