Rudolph cake decorations
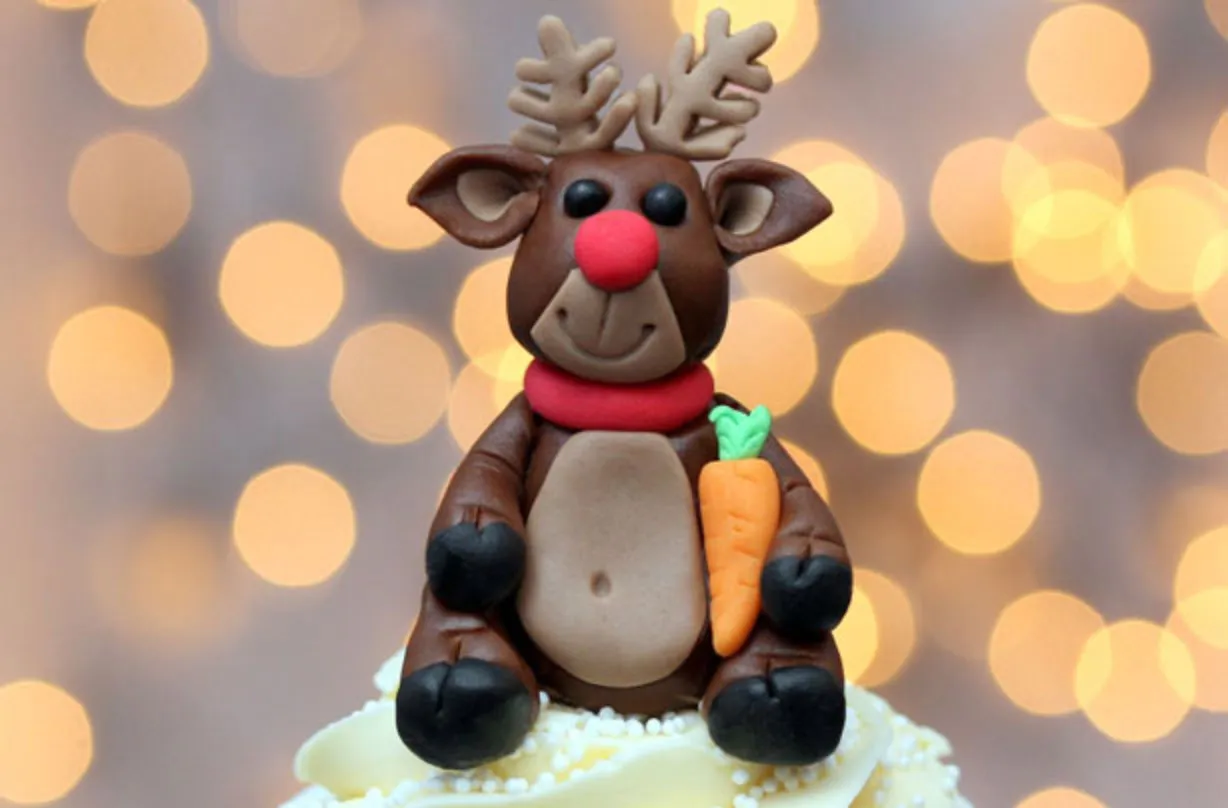
Make sure you have lots of little Rudolphs to brighten up your baking this Christmas by using this clever how-to-guide by Victoria Threader. We love their cheeky little faces and cute carrot snacks! This recipe will make 12 toppers which will last for up to 6 months if kept in a breathable card cake box, which means you can make them well in advance.
Ingredients
- 220g chocolate fondant
- 30g modelling paste
- 10g black fondant
- 10g red fondant
- 5g orange fondant
- 2g green modelling paste
- Black sugar pearls
- 2 spaghetti strands (uncooked)
Step 1

The night before you want to make your Rudolphs you’ll need to make the antlers. Mix the 30g of modelling paste 20g of chocolate fondant to make a beige gum paste (this will make the antlers more sturdy) Roll the gum paste to 3mm thick and cut a 55mm snowflake. Using a sharp knife or craft knife, cut the spines off to a point and leave to dry on a drying sponge or a sheet of greaseproof paper. Repeat until you have 12 antlers. Wrap the remainder of the paste up in cling and pop in an air tight box.
Step 2

To make the heads: mould small pear shapes from the chocolate fondant.
For the mouths: cut a 30mm circle for the mouth, then cut sections away for the chin. Use the smile tool or cocktail stick to add a smile and dimples at the end of the smile with the small ball tool or cocktail stick.
For the noses: roll tiny balls of red fondant
For the eyes: use black pearls for the eyes.
For the ears: cut a small square from the chocolate fondant, then cut a smaller square from the beige fondant and stick it to the chocolate square with a brush of water. Cut in half diagonally and bring to two furthest points together, pinching to a point. Trim the point off so you have a flat edge to stick.
Step 3

Use a small clean paint brush with a touch of water to stick the head on. First sticking the chin on, then the ears, nose and eyes and finally brush the bottom of the dried antlers with a touch of water and push them into the top of the head.
Step 4

For the body: mould a larger pear shape from the chocolate fondant and push a piece of dried spaghetti into the body to support the head.
For the tummy: cut a 30mm circle and the then pull the top to make a pear shape and add a belly button using the small ball tool or cocktail stick.
For the collar: roll a ball of red fondant and squash it flat.
For the arm and legs: roll sausages, making the legs a bit thicker, and mark using a cocktail stick.
For the hooves: roll small balls of black fondant.
Step 5

To assemble, brush the body with a touch of water and stick on the tummy. Add the collar by pushing it onto the spaghetti. Add the legs by sticking with a brush of water and bending around the body to the front, then do the same with the arms. Add the hooves by sticking and pushing the balls of black fondant to the ends of the leg/arm and emboss down the centre with a Cocktail stick.
Step 6

To make the carrot, roll carrot shapes with the orange fondant and shape green leaves for the ends. Make a hole in the end of the carrots and, with a brush of water, push the leaves into the ends.
Step 7
Add the carrots to the topper. Use to decorate your christmas baking!
