How to make chocolate truffles
Chocolate truffles are not only super simple to make, they're also a lovely homemade treat, and a perfect idea for a birthday or Christmas gift. To make this chocolate truffle recipe you only need four ingredients, plus they're ready in five easy steps. In this easy chocolate truffle recipe, we've made dark chocolate truffles with a white chocolate centre, to balance out the creamy filling with a rich chocolate shell. Watch our video to see how to make Chocolate truffles, which would make a thoughtful food gift or sweet party nibble to pass round.
White chocolate contains less cocoa solids than plain chocolate, so the white chocolate filling is softer than you might expect and needs a little more care when coating them - but these chocolate truffles are so worth the effort when you bite into that surprise centre.
For flavour, we used Cointreau in the white chocolate filling but you can leave the alcohol out altogether if you'd prefer to make truffles that even the kids can eat!
For a bit of variety, you can experiment with the chocolate - try dark chocolate centres in white chocolate, or coat the white centres in milk chocolate. The combinations are endless.
Chocolate truffles recipe
Makes: 50-60 chocolate truffles Per truffle: 93 calories, 6g fat (4g saturated fat)
For more foodie gift ideas, take a look at our homemade food gift recipes.
Ingredients
For the ganache centres:
- 400g white chocolate, or use dark chocolate for a dark centre
- 300ml whipping cream
- 2tbsp spirit or liqueur, such as brandy, Drambuie or Cointreau (optional)
For the coating:
- 500g chocolate, dark or white, melted and tempered (optional)
Step 1

To make the ganache mixture for the centres of your chocolate truffles, break the chocolate into pieces and place in a bowl. Bring the whipping cream to the boil and pour it over the chocolate. Stir the chocolate until it’s completely melted. Add the spirit or liqueur, if using.
Chill the mixture until it’s firm - it’s best to leave it overnight, but it can be used after just a few hours if time is short.
Step 2

Shape the white chocolate truffle mixture into balls, either by using a melon baller and then rolling them by hand, or scooping out pieces using a teaspoon. Pop them in the fridge to firm up, then shape into balls.
If you have hot hands, run cold water over them and dry them before you start, so that this stage is less messy. You can also wear food-safe gloves for less mess and smoother rolling. Place the balls on a sheet of baking parchment and chill until firm.
Step 3

If you want super-shiny, professional-looking chocolate truffles, you will need to temper your chocolate - see our guide for how to temper your chocolate. If just for family and friends, melted chocolate works just as well and is less fiddly.
Step 4

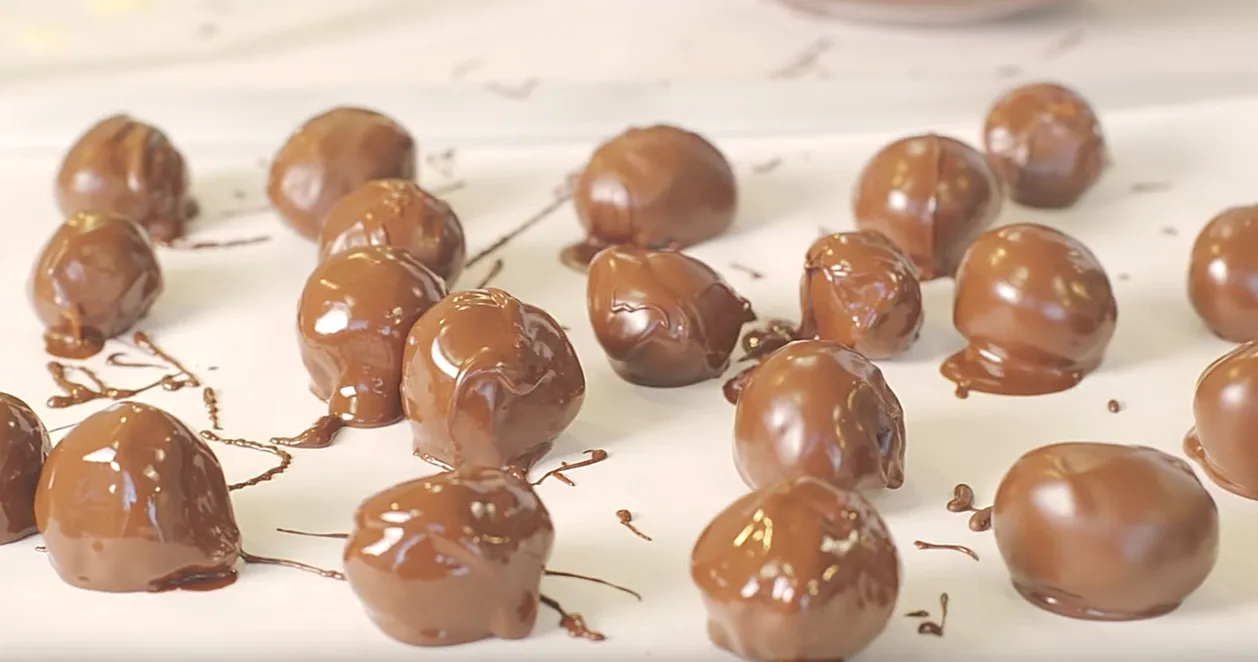
Dip the truffles, one at a time, into the tempered or melted chocolate, using the chocolate-dipping spiral, or 2 forks, to turn them in chocolate. Let excess chocolate drip off the truffles over the bowl, then transfer them to a sheet of baking parchment. There may be some chocolate leftover, but it’s easier to work with a bit extra to have room to dip the truffles. This extra chocolate can be poured on to baking parchment, then broken into pieces and eaten once it’s set.
Step 5
Leave the truffles in a cool place to set. The truffles will keep for up to a week if kept in a cool place (preferably not the fridge). The truffles are not suitable for freezing.
