Red velvet Christmas cake
Our red velvet Christmas cake is a tasty twist on a classic Christmas cake, and it's gluten free. The stunning cake is rich with fruit and spices.
This red velvet Christmas cake is a delicious twist on a traditional fruit cake and has the added bonus of being gluten-free. Cranberries, orange juice, ruby port and ground almonds all lend festive flavours to this American classic.
Gluten-free cakes can sometimes taste dry, but the addition of grated beetroot makes this cake exceptionally moist. Once the cake has cooled, follow along with our step-by-step picture guide as we show the simplest way to cover your cake in marzipan and royal icing.
Looking for a more traditional Christmas cake recipe? You can’t go wrong with Mary Berry’s classic.

Ingredients
For the cake:
- 200ml ruby port
- finely grated zest and juice of 1 orange
- 350g mixed dried fruit
- 150g dried cranberries
- 250g butter
- 250g dark muscovado sugar
- 4 large eggs
- 250g gluten-free plain flour
- 1tbsp ground mixed spice
- pinch of gluten-free baking powder
- 90g beetroot, grated
- 2tbsp beetroot powder or squeeze of red paste colouring
- 1tbsp vanilla extract
- 60g ground almonds
- 20cm greased and lined deep cake tin
To decorate:
- 3tbsp apricot jam, warmed and sieved
- 1kg packet white marzipan
- 500g packet royal icing
- 1tsp glycerine
- bronze sand glitter
- bronze crunch sprinkles
- 5cm wide gold ribbon
- Bottle Brush Christmas trees
Step 1
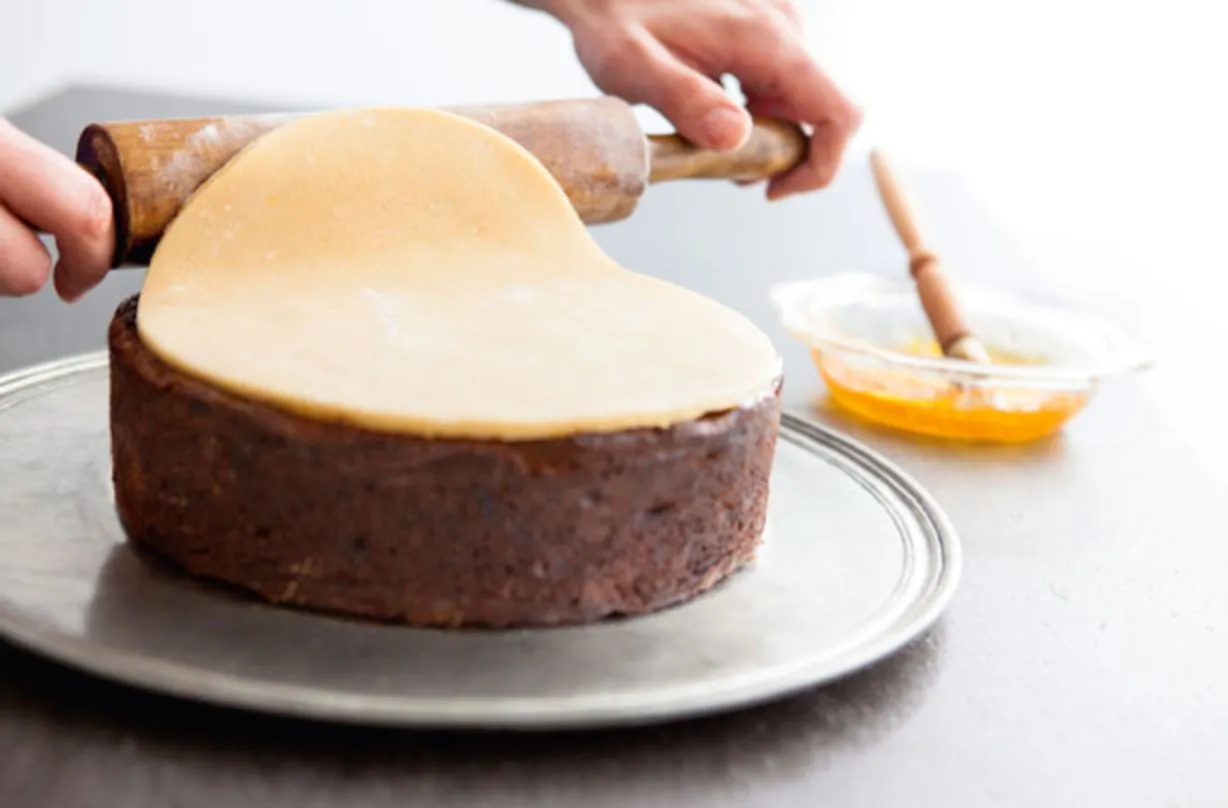
To assemble, trim the top off the cake to level, if needed, and upturn on to a cake board or serving plate. Brush the cake top and sides with the apricot jam.
Cut out a baking parchment template – a 20cm round using the cake tin as a guide, plus a strip for the sides. Roll out the marzipan on a large sheet of baking parchment and cut to size, using templates. Press the marzipan round on top of the cake. Put the long marzipan strip on to the parchment strip and lift up on that as you press it on to the cake sides.
Step 2

Use a palette knife to spread the icing over the top and sides of the cake. Paddle the knife backwards and forwards to remove any bubbles. Occasionally dip it into boiling water, if needed, to help smooth the surface. Create a slightly swirled peak effect all over the top and smooth sides. Leave to dry.
Sprinkle over the bronze sand glitter and crunch sprinkles, arrange Christmas trees on top. Tie a ribbon around the sides to finish.
