These delicious peanut butter and jam slices are really simple to make. They're the perfect weekend treat to make with the kids. A soft layer of peanut butter sponge sandwiched together with a generous helping of jam makes these slices irresistible. Our mummy blogger, Anneliese made these peanut butter and jam slices as part of her goodtoknow blog Mummy's Little Helpers.
Ingredients
- 115g butter, softened
- 125g caster sugar
- 175g smooth peanut butter
- 1 large egg
- 200g plain flour
- ½tsp baking powder
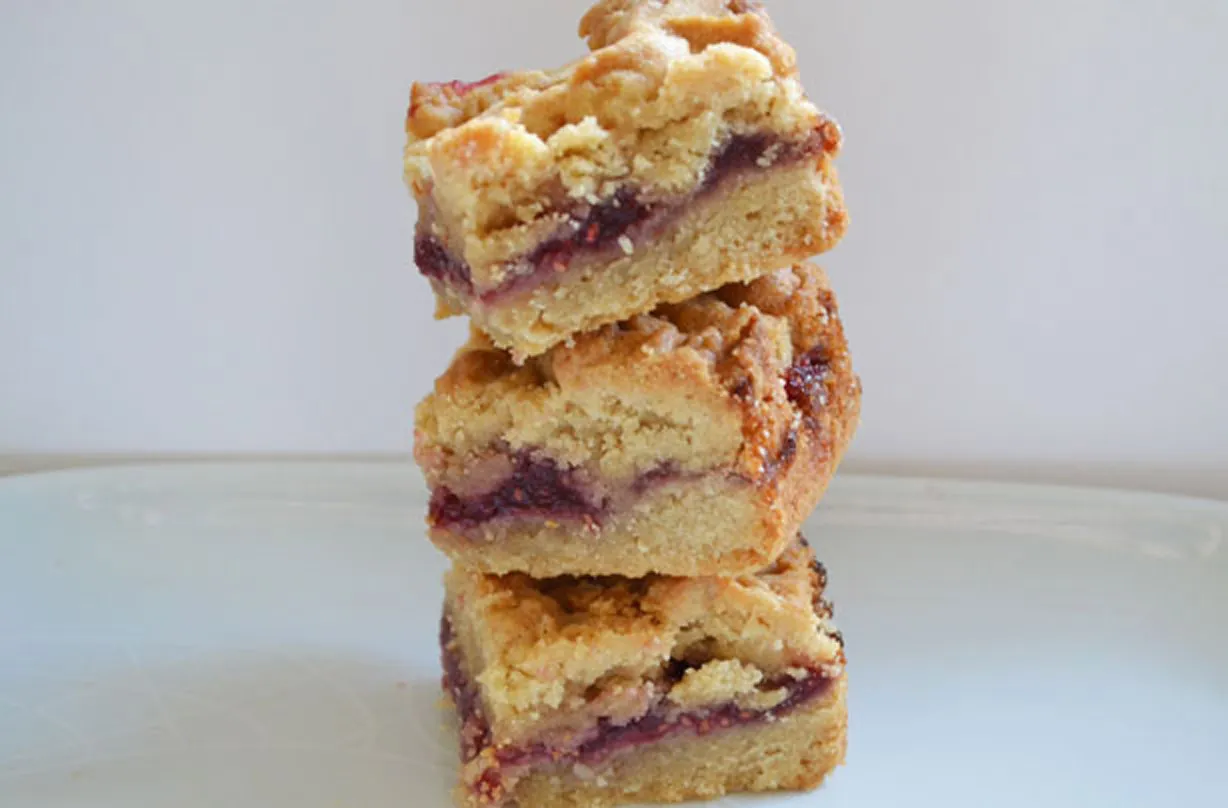
- 225g raspberry jam
WEIGHT CONVERTER
Method
- Preheat oven to 180°C/350°F/Gas Mark 4. Grease an 8 inch square baking tin with butter; this is a perfect job for a your little helper. While they busy themselves with this task, you can cut a piece of greaseproof paper to size and then use it to line the base and sides of your heavily greased tin!
- Using a wooden spoon or balloon whisk your child can beat the butter, sugar and peanut butter in a large bowl until smooth. This can take a little bit of elbow grease but, as long as the butter is nice and soft, your child should be able to manage most of this task on their own.
- If your child is keen to crack the egg, then it might be wise if they do so into a separate bowl so that pieces of stray shell can be detected and easily picked out. This will put a stop to a suspiciously crunchy cake! Now your child can pour the egg into the mixing bowl to join the rest of the ingredients. Pass the wooden spoon or balloon whisk back to your little helper and ask them to give the mixture a good mix until everything is combined. I admit that the mixture does not look particularly appetising at this point but I promise things will improve!
- Help your little one to sift the flour and baking powder into the mixing bowl. To help prevent a floury mess, I add it to my boy’s sieve a little at a time. He has a great time pretending that it's snowing!
- You may well have to lend a hand when stirring in the flour as it will turn into a fairly stiff mixture, so best flex those muscles! How about you both hold the spoon/whisk and do the last bit together?
- See if your helper would like to transfer half of the dough to the lined baking tin. They can press the dough into the tin with their little fingers before turning their attention to the sticky jam.
- Using the back of a spoon they can spread the raspberry jam all over the dough in as even a layer as they can manage.
- Splodge (I love that word) the remaining dough over the top of the jam in uneven pieces. No need to worry about covering up all of the jam as the dough will spread out while it is in the oven and it makes the finished bars look a little more interesting.
- Place the bars into the hot oven and bake until the top is a rich golden brown, which should take approximately 45 minutes.
- Once the bars are cooked all the way through place the tin onto a wire rack to cool. Cool the bars in the tin for 30 minutes at the very least before attempting to remove them from the tin! Keep the bars cooling on a wire rack until they are completely cold.
- When the bars are cold, remove the greaseproof paper and cut into roughly 12 slices. Try to convince yourself that the jam is part of your five a day, as you reach for a second slice!
Top Tip for making Peanut butter and jam slices
You could try this recipe with peanut butter and Nutella instead
Parenting advice, hot topics, best buys and family finance tips delivered straight to your inbox.

Author, writer and Mum of three, Anneliese Giggins has been creating recipes for Goodto.com for the past 9 years. She has also created food-related content for household names such as Daily Mail, Daily Express and Goodto.com. Her most successful to date was how to feed a family of 4 on £20 a week.