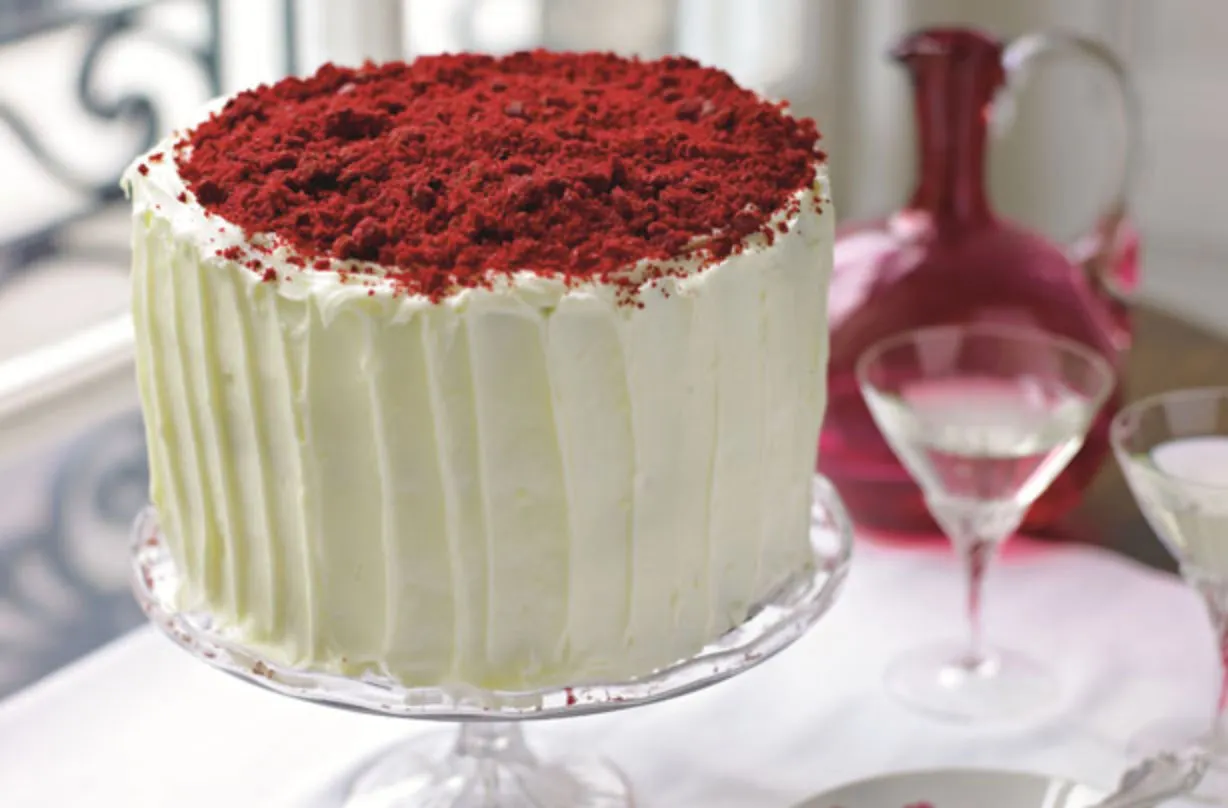
Stacie Stewart's red velvet cake is delicious and impressive. The Beehive Baker's scrumptious recipe makes a rich, ruby red sponge, all smothered in a light cream cheese frosting. When making red velvet cake, it’s really important to use the right red food colouring. Don’t get the standard red colouring, as the cake will turn brown when you bake it. Of course, this is not just for Valentine’s Day; it’s a pretty cake for parties, and the mixture makes amazing cupcakes, too.
Love baking? We've got loads more lovely cake recipes right here.
Ingredients
- 175g unsalted butter, at room temperature, plus extra for greasing
- 450g cups caster (superfine) sugar
- 3 eggs, at room temperature
- 3tbsp cocoa powder
- 38ml bottle red food colouring (Dr Oetker Natural Red or 1 heaped tsp Sugarflair Red Extra)
- 1tsp vanilla extract
- 500g plain (all-purpose) flour
- 1tsp salt
- 340ml buttermilk
- 1½ tsp bicarbonate of soda (baking soda)
- 1½ tsp cider vinegar
For the cream cheese frosting:

- 125g unsalted butter, at room temperature
- 175g full-fat soft cheese
- 500g icing (confectioners’) sugar
WEIGHT CONVERTER
to
Method
- Preheat the oven to 180°C/350°F/Gas Mark 4. Grease 2 x 20cm diameter cake tins and line with baking parchment.
- Beat the butter for a minute or so, until light and fluffy. Add the sugar and beat until incorporated. Scrape down the bowl to ensure all the ingredients are combined. Beat in the eggs, one at a time. Beat in the cocoa, food colouring and vanilla extract.
- Sift the flour and salt into a bowl, then add to the butter mixture in three stages, alternating with the buttermilk and scraping down after each addition.
- Put the bicarbonate of soda and cider vinegar in a small bowl and whisk until it bubbles up. Add this to the cake batter and give it one last quick beat. The addition of the vinegar and bicarbonate will make the colour of the cake develop and stay red when cooked. Spoon the mixture into the tins and level the top of the batter.
- Bake for 45 minutes to 1 hour. After 30 minutes, cover the top of the cake with foil to prevent it from browning too much. Test the cake after 45 minutes; when it is cooked, a knife or skewer inserted in the centre will come out clean. Remove the foil and leave to cool on a wire rack for around 30 minutes. Remove from the tin and leave until completely cool before decorating.
- To make the frosting, beat the butter until softened, then add the soft cheese and beat for a few seconds to combine. Scrape down the bowl to make sure everything is mixed, then add the icing sugar and beat again. The longer you beat, the creamier the icing will be. Set aside at room temperature until you’re ready to use it. If it’s a warm day, put it in the fridge but take it out 10 minutes before you want to use it.
- To decorate the cakes, you first need to level them. Use a bread knife to slice a small section off the top and make it as flat as possible. (Keep the sliced-off section to decorate the cake.)
- Next you have to cut each cake in half horizontally; again, use a bread knife. Now you have four layers of cake. Put the bottom layer of cake on your cake plate. Spread with the icing, making sure it’s not too thick; about 1cm/½in is perfect. Repeat with all the layers.
- Next, cover the outside of the cake with icing; use a palette knife or a butter knife. Finally, crumble the reserved sliced-off sections of cake, and scatter the crumbs all over the top of it. The cake will keep in an airtight container for around 4 days, but it’s far too beautiful to hide or keep!
Top Tip for making Stacie Stewart's red velvet cake
You could also coat this delicious cake with chocolate cream cheese frosting instead