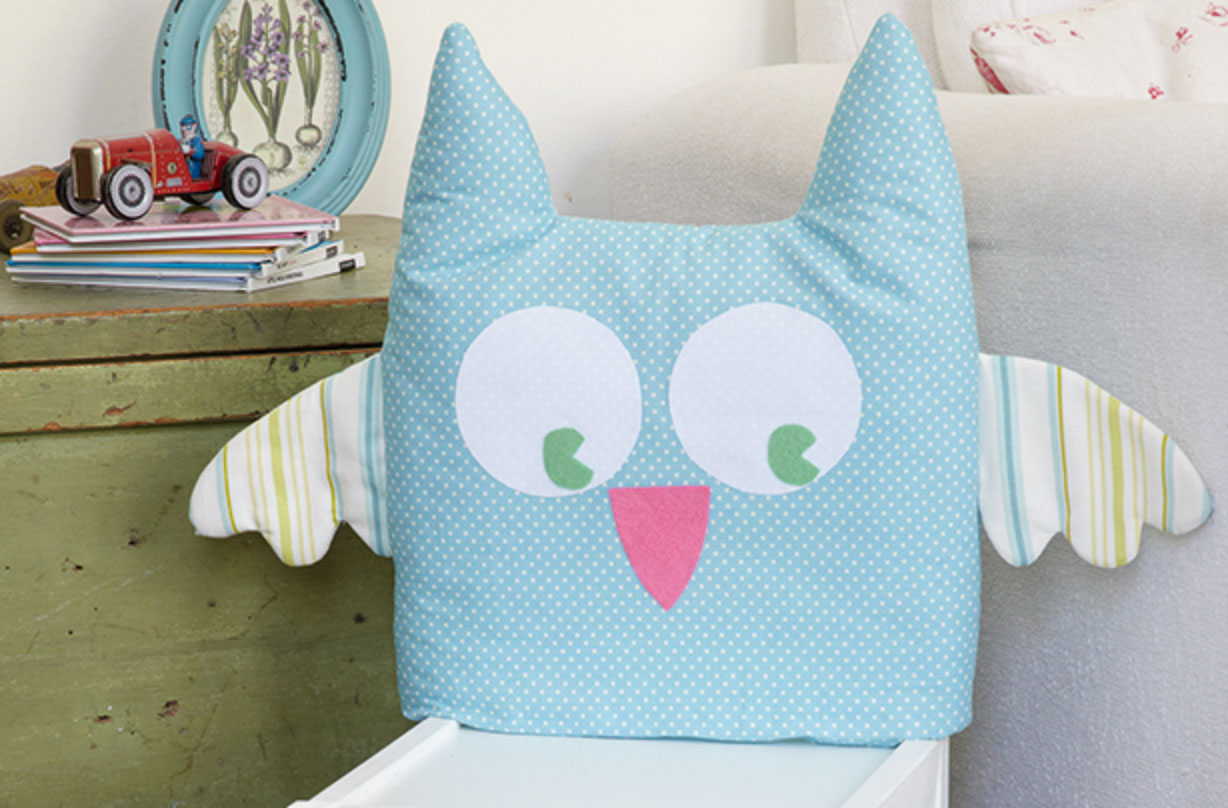
How to make an owl chair cover
Spruce up an old chair, and make it more comfortable, with our adorable owl chair cover. The kids are going to love this one!


This super- sweet chair cover is a fun and simple sewing craft that your kids will love for years to come.
Pop it over the back of their favourite chair for a more comfortable feel and playful finish. But be warned - if you have more than one tot - they'll all want one!
If you've got lots of scraps of fabric in your craft bag then this is the perfect way to use them all up. We love using clashing prints and colours for a bold look but you could ask your child to choose their favourite fabrics, or make it in tones to match their bedrooms.
It doesn't have to be an owl, although we think this little chap is adorable. You could make a cat by forgoing the wings and beak, and adding some whiskers and a round pink nose instead. Or what about a puppy? Simply add rounded ears and a sticking-out tongue for a classic cartoon puppy look.
This really is easier than it looks, we promise! See below for how to make it in just a few simple steps.
You will need
- Fabric
- Scissors
- Pins
- Thread
- Sewing machine
- Wadding,
- Double sided bonding (Vilene)
Step 1
Start by cutting out an owl shape that is 10cm wider than your chair all the way round including the ears. You will need two owl shapes in fabric, two in wadding and two in lining fabric.
Step 2
Cut out the eye and beak shapes and secure onto the front owl shape fabric with double sided bonding.
Parenting advice, hot topics, best buys and family finance tips delivered straight to your inbox.
Step 3
Cut out four wing shapes and lay each pair together - right sides facing each other. Pin and sew around the outside edge leaving a gap at the top. Pad out with wadding.
Step 4
To prepare the owl cover lay a fabric owl shape -right side down then add the wadding and then the lining fabric. To ensure they stay in place pin and sew around the side and top edges. Repeat for the back piece.
Step 5
Position the wings in place over the front of one owl shape (right side facing up) so the outer edges are lined up.
Step 6
Place the back panel over the top and pin together. Carefully sew through all six layers all the way around the top and side edges catching the wings at the same time.
Step 7
Turn through the right way and hand stitch the bottom edge closed. Place over the chair back and you're done. Comfy kids seat.

Jessica Dady is Food Editor at GoodtoKnow and has over 12 years of experience as a digital editor, specialising in all things food, recipes, and SEO. From the must-buy seasonal food hampers and advent calendars for Christmas to the family-friendly air fryers that’ll make dinner time a breeze, Jessica loves trying and testing various food products to find the best of the best for the busy parents among us. Over the years of working with GoodtoKnow, Jessica has had the privilege of working alongside Future’s Test Kitchen to create exclusive videos - as well as writing, testing, and shooting her own recipes. When she’s not embracing the great outdoors with her family at the weekends, Jessica enjoys baking up a storm in the kitchen with her favourite bakes being chocolate chip cookies, cupcakes, and a tray of gooey chocolate brownies.