How to make an origami Christmas tree
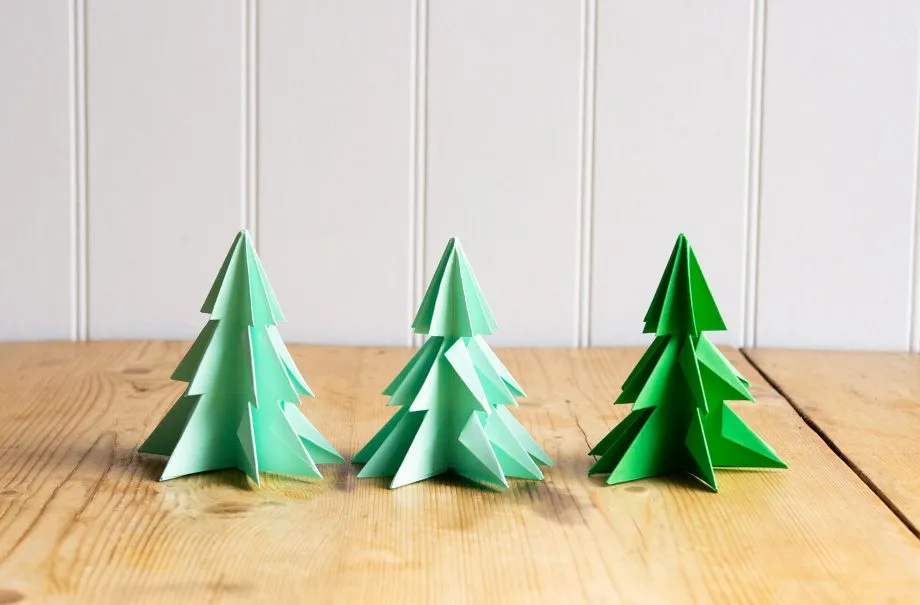
Learning how to make a set of origami Christmas tree decorations is easy, all your need is some green paper, a pair of scissors, and a ruler

If you're wondering how to make an origami Christmas tree then you've come to the right place! Follow our simple step-by-step guide below.
It’s hard to find crafts to keep older kids entertained, but these origami Christmas trees are sure to get them in the Christmas spirit. Once they’ve mastered the simple origami technique, your house will be full of these Christmas tree decorations.
Have a go at changing the size of paper to create huge or tiny variations. Small origami Christmas trees make great place settings for a Christmas table. Change up the colour of the paper too for each guest.

Looking for more Christmas crafts for kids to get them creating and keep them busy over the holidays? Take a look at these Christmas tree cards, stitched Christmas tree decorations, or wooden Christmas ornaments.
To make an origami Christmas tree you will need:
- A4 sheet of green stiff paper or card
- Scissors
- Ruler or paper creasing tool
For craft supplies, check out Wilko
How to make an origami Christmas tree:
1. Fold the paper along the diagonal and cut away the excess.

2. Open out the square of paper and fold in the opposite direction.

3. Then, open out the square of paper and fold again, not along the diagonal this time.

4. Tuck two of the opposite diagonal creases in on themselves and flatten the paper to form a square shape. Fold the edges in on themselves to form a triangle. Repeat on both sides. Use a ruler or creasing tool to help make your folds accurate and sharp.

5. Snip off the bottom of the origami Christmas tree.

6. Open out the centre folds and then tuck the creased edge in on itself so the front of the Christmas tree is flat.

7. Then use a pair of scissors to make two cuts along the folded sides of the origami Christmas tree.

8. Fold the top of the cuts back on themselves to form a traditional Christmas tree shape. Remember to use a ruler or paper creasing tool to help you.

9. Once all the cuts have been folded, spread out the paper folds to form a 3D Christmas tree decoration.
